Today I did change IP of one of our HA Wireless Controllers. Since the company I work for got bought last year we have to change IP of our systems to fit into our new and bigger network.
Changing the IP address isn’t a big thing and you can do it without any downtime on the AP’s if you run flexconnect. If you run in local mode you will be looking at a short downtime. If you want to do it with the minimal of downtime you need a third controller that can host your AP’s while the HA cluster is down.
If you have a third controller that can host your AP’s you have to make sure that the mobility groups are configured and working to your HA. You can check this in the following menu: Controller -> Mobility Management -> Mobility Groups. In this menu all your mobility groups are listed. If the mobility group towards the controller is Up you should see it on the right side of the page. You also have to check this on the HA controller.

If the mobility group is up and running then the next thing is to change primary controller for the AP’s. This is a very easy task but it’s time consuming if you don’t have Cisco Prime ( I got that luckily). From Cisco Prime you can just send out a template to all the AP’s and make them move to another primary controller. If you want to do it manually you can do it to. Then you have to first open an AP and choose High Availability. Then you configure the third controller as Primary. Within the next few minutes all the AP’s should be moved to a new controller.

When there is no connected AP’s left we can start the work to re-IP the HA controller. The first thing we have to do is to break the HA cluster. We are not able to change the IP without breaking the cluster. When breaking the cluster there will also be a restart, so if you don’t have another controller for your AP’s, be ready for some downtime!
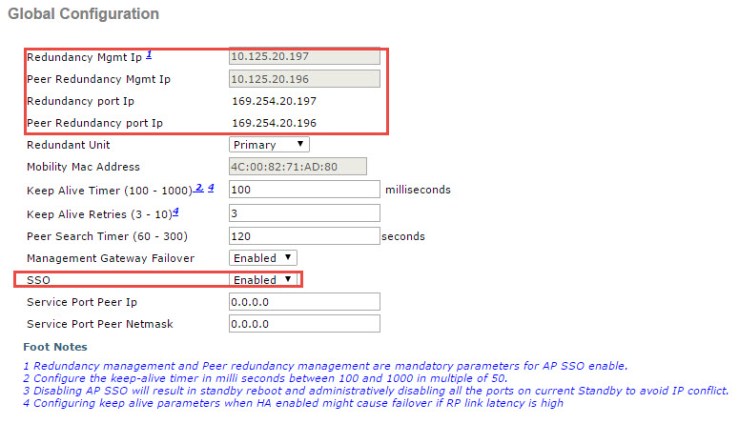
To disable the cluster you go to Controller -> Redundancy -> Global Configuration. In the lower part of the page you have the option to Disable or Enable the cluster. Set the drop down to Disabled and press Apply in the top right corner. The controller will then ask you if you are sure about breaking the cluster and that the controller will restart. Accept this and wait for a few minutes.

The WLC will after a few minutes boot up again on the same IP address as before. Then you should go to the Interface menu to change the management IP address.

Change the IP Address, Netmask and Gateway to the new values and press Apply. You will now loose connection and need to connect on the new IP’s It’s very important to enter the correct IP’s so you don’t loose contact (or you could use the integrated service port if you have a 550x).

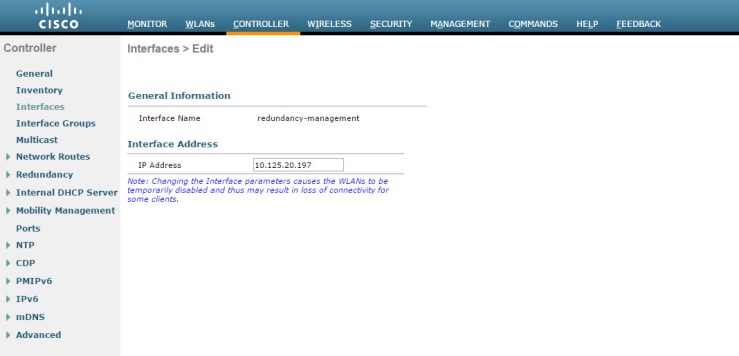
The next interface you need to change is the redundancy management IP address. This IP should be in the same subnet as the management IP. So unless you change the IP to something in the same subnet as your previous IP you need to change this IP also. This IP also needs to match the Redundancy mgmt IP in Controller -> Redundancy -> Global Configuration.
The last thing you need to do o this controller is go back to Controller -> Redundancy -> Global Configuration and change the IP’s for the Redundancy mgmt IPs and enable the cluster again.
You should now be finished With the first Controller. The IP for the WLC HA is now active and if you want to move the AP’s to the New Controller you can do that now. You shoudl be able to Connect to the remaining Controller on the old management IP address. You should repeat the steps for changing the Redundancy mgmt IP and Redundancy port IP. When this is done you only need to enable the cluster on this Controller also and the HA should be working again as before.
When you have enable HA on the second Controller you can go to Monitor -> Redundancy -> Summary. There you will be able to see if the HA cluster is running successfully again.

Your cluster should now be working correctly. If you got questions or feedback please leave a comment!


