Hi all
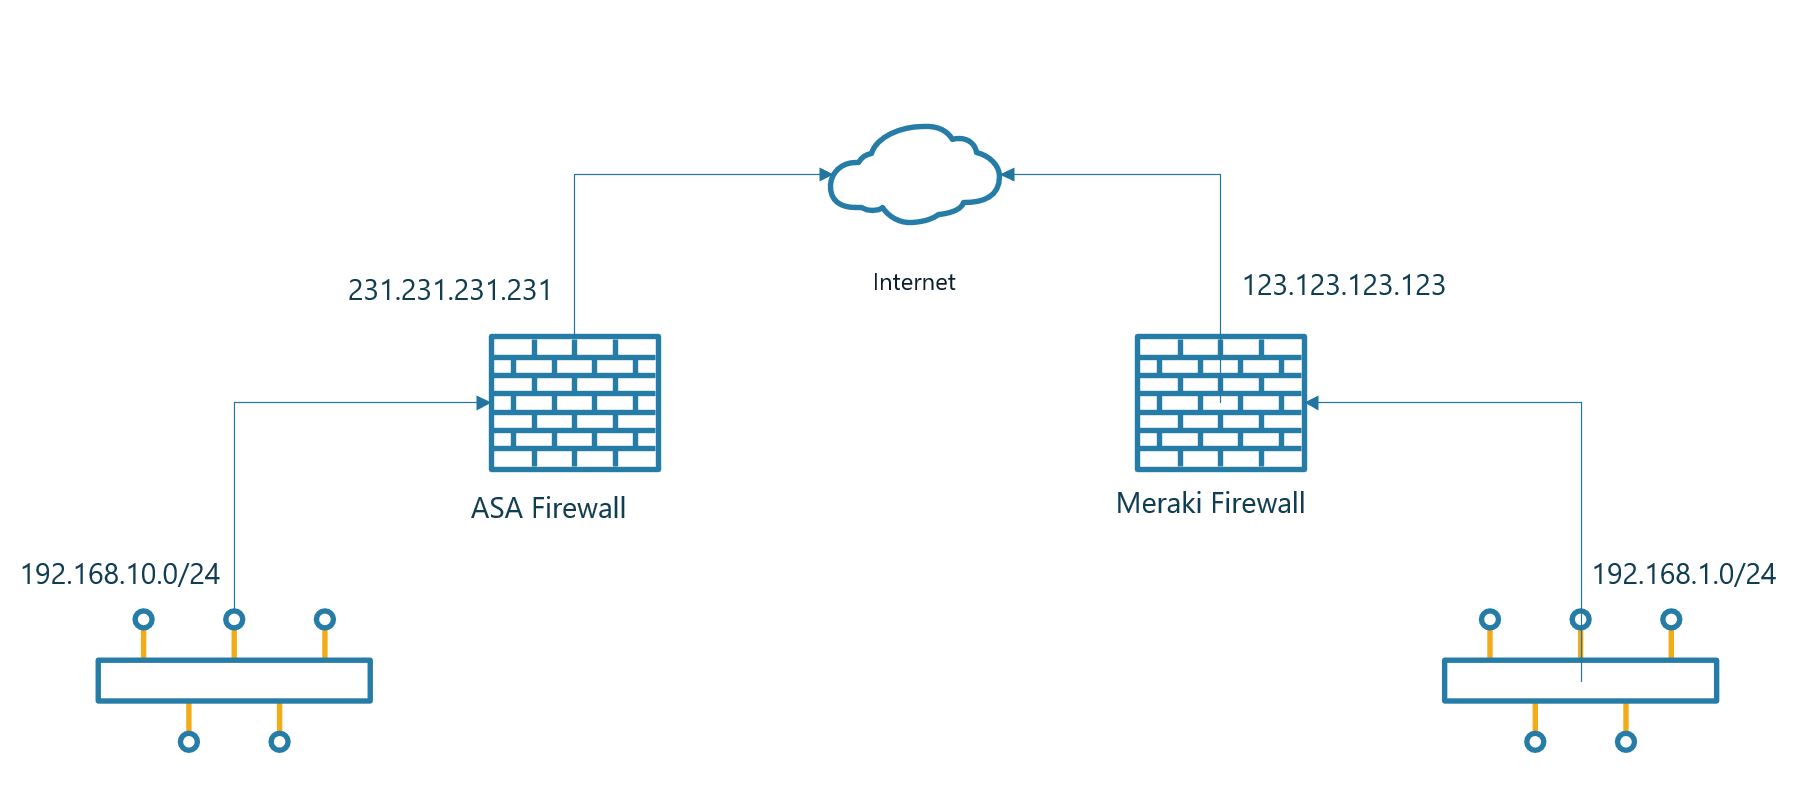
VPN’s are always a pain in the ass when it comes to different vendors and OS. Even if both Meraki and ASA is part of the Cisco brand there is still quite a few differences in the setup and as always alot of ways to do it incorrectly.
Let’s start with the ASA end of the link. The first thing we need to do is set up the IKE profile. Meraki uses only IKEv1 so there is no need for IKEv2.
crypto ikev1 enable outside
 crypto ikev1 policy 10
 authentication pre-share
 encryption 3des
 hash sha
 group 2
 lifetime 12800
Define the networks you wan’t to have on each end of the Meraki firewall.
 object network OBJ-ASA-Site
 subnet 192.168.10.0 255.255.255.0
 object network OBJ-Meraki-Site
 subnet 192.168.1.0 255.255.255.0
Now we will make sure that the traffic that is intended for the VPN is passed trough the tunnel. In the NAT rule the traffic is originating from the interface labeled server.
access-list MERAKI-INTERESTING-TRAFFIC extended permit ip object OBJ-ASA-Site object OBJ-Meraki-Site
nat (server,outside) source static OBJ-ASA-Site OBJ-ASA-Site destination static OBJ-Meraki-Site OBJ-Meraki-Site no-proxy-arp route-lookup
We will have to let the ASA know where to terminate the tunnel. Including the preshared key. It’s important to change the preshared key and use something a bit more secure.
tunnel-group 123.123.123.123 type ipsec-l2l
 tunnel-group  123.123.123.123  ipsec-attributes
 pre-shared-key supersecret
 isakmp keepalive threshold 10 retry 2
Finally we have to put everything together and let the ASA know where to terminate the VPN tunnel.
crypto ipsec ikev1 transform-set MERAKI-TRANSFORM esp-aes-256 esp-sha-hmac
 !
 crypto map CRYPTO-MAP 1 match address MERAKI-INTERESTING-TRAFFIC
 crypto map CRYPTO-MAP 1 set peer 123.123.123.123
 crypto map CRYPTO-MAP 1 set ikev1 transform-set MERAKI-TRANSFORM
 crypto map CRYPTO-MAP interface outside
Below is all the commands in one go to make it easier for a copy/paste.
crypto ikev1 enable outside
 crypto ikev1 policy 10
 authentication pre-share
 encryption 3des
 hash sha
 group 2
 lifetime 12800
 !
 object network OBJ-ASA-Site
 subnet 192.168.10.0 255.255.255.0
 object network OBJ-Meraki-Site
 subnet 192.168.1.0 255.255.255.0
 !
 access-list MERAKI-INTERESTING-TRAFFIC extended permit ip object OBJ-ASA-Site object OBJ-Meraki-Site
 nat (server,outside) source static OBJ-ASA-Site OBJ-ASA-Site destination static OBJ-Meraki-Site OBJ-Meraki-Site no-proxy-arp route-lookup
 !
 tunnel-group 123.123.123.123 type ipsec-l2l
 tunnel-group  123.123.123.123  ipsec-attributes
 pre-shared-key supersecret
 isakmp keepalive threshold 10 retry 2
 !
 crypto ipsec ikev1 transform-set MERAKI-TRANSFORM esp-aes-256 esp-sha-hmac
 !
 crypto map CRYPTO-MAP 1 match address MERAKI-INTERESTING-TRAFFIC
 crypto map CRYPTO-MAP 1 set peer 123.123.123.123
 crypto map CRYPTO-MAP 1 set ikev1 transform-set MERAKI-TRANSFORM
 crypto map CRYPTO-MAP interface outside
Then let’s move over to the Meraki part. This part is really easy compared to the ASA part. There isn’t much configuration to do on the Meraki to get everything up and working,.
The first thing you need to do is go to Security Appliance -> Configure -> Site-to-.Site VPN. Select Hub in the options list.

Select the networks that should be routed trough the VPN. In the previous config we said that 192.168.1.0/24 should be routed from the Meraki site.
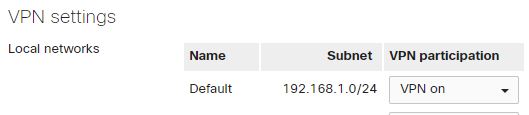
The last part would be to configure the VPN settings on the Meraki. First column you enter a name for the connection. Secondly you need to enter the IP for the ASA firewall. In the third column you decide what networks should be sent over the VPN. The same network that we defined as OBJ-ASA-Site in the ASA config. Leave the IPSec policies as Default, the connection should come up with the Default setting. At last you enter the pre shared key, press save and you should have a VPN connection.

